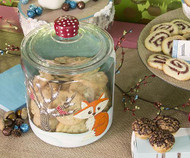
Winter Fox Woodland Cookie Jar
Posted by DecoArt on Nov 16th 2015
This oh-so-foxey cookie jar, alive with furry and feathered forest creatures, is great for a Christmas cookie exchange!
SUPPLIES
- water container
- palette or plastic plate
- paper towels
- tracing paper
- transfer paper
- rubbing alcohol
- scissors
- pencil
- 1-1/2" flat brush
- #10 flat brush
- #12 flat brush
- #1 liner brush
- #1 round brush
- assorted scrapbook paper
- clear glass jar
INSTRUCTIONS
NOTES:
Let dry completely between painting steps.
- Use rubbing alcohol and paper towels to clean and dry the glass jar.
- With a pencil and the tracing and transfer papers, trace and transfer the tree pattern on the back of the wood grain scrapbook paper. Hold the turquoise scrapbook paper up to the jar to see through the back for a sky. Use scissors to cut out the two shapes.
- Use a 1-1/2" flat brush and Americana Dishwasher-Safe Decou-Page to cover half of the jar from the bottom to the top ledge.
- Quickly apply the turquoise paper for the sky, facing the glass and brushing more Dishwasher-Safe Decou-Page to the back of the paper to protect it. Rinse brush.
- Use a smaller brush (like a #12 flat brush) to apply some Dishwasher-Safe Decou-Page to the front of the jar.
- Quickly place the tree facing out and apply more Dishwasher-Safe Decou-Page on top to protect it. Use a damp paper towel to wipe any excess Decou-Page off the jar around the tree while still wet. Rinse brush.
- On a separate scrapbook paper of choice and with the tracing and transfer papers and a pencil, trace and transfer the two bird patterns and cut out with scissors.
- Use a #10 flat brush and Dishwasher-Safe Decou-Page to adhere the two birds anywhere on the tree. Rinse brush. Use a damp paper towel to wipe off any excess Decou-Page around the birds.
- Use a pencil and the tracing and transfer papers to trace and transfer the fox onto the front of a scrapbook paper of choice. (The closer it looks to fur color, the better.)
- Use a #1 round brush and Pumpkin Patch to paint the fox's head, ears, body, and tail. (Refer to photo for placement.) Rinse brush.
- Use the same #1 round brush and Paprika to shade the overlapping areas (like where the tail and body and the head and body, meet). Also shade the face as you would like and the bottom of the fox. Rinse brush.
- Use the #1 liner brush and Cocoa Bean to paint the eyes and then, without cleaning the brush, add Bittersweet to shade the right bottom of the eyes. Rinse brush.
- Use a pencil and the tracing and transfer papers to trace and transfer the Christmas tree pattern onto another piece of scrapbook paper. Use scissors to cut out.
- Load a stencil brush with Cotton Ball and wipe off any excess paint onto a paper towel. Lightly dab on the paint to look like snow on each section of the tree. Rinse brush.
- Use the #12 flat brush and double-load with Cotton Ball and Coastal Waters to shade the snow, keeping the brush flat and moving it to its side. Rinse brush.
- Use the #12 flat brush and Dishwasher-Safe Decou-Page to adhere the fox. Use a damp paper towel to remove any excess Decou-Page.
- Use the same brush with Dishwasher-Safe Decou-Page to adhere the Christmas tree. Rinse brush. Use a damp paper towel to remove any excess Decou-Page.
- Use the duo tool on the end of the stencil brush or handle end of smallest brush dipped into Bittersweet to add an eye to each bird. Wipe off the duo tool with a paper towel.
- Dip the stencil brush into Cotton Ball and wipe off excess paint onto a paper towel. Pounce the paint on to look like snow. (Refer to photo.) Rinse brush.
- Use a #10 flat brush and Dark Scarlet to paint the top knob on the lid only. Rinse brush. Let dry completely.
- Use the handle of the #10 flat brush and Cotton Ball to put random polka dots all over the lid. Wipe off the handle end with a paper towel.
- Follow the Americana Multi-Surface Acrylics label instructions on cure times before putting food in or trying to wash the jar.


