DIY Under-Bed Storage Drawers

DIY Under-Bed Storage Drawers

Posted by DecoArt on Aug 26th 2015

Store clothing or other essentials in a tight living space with under-the-bed storage.

SUPPLIES

    • water container
    • paper towels
    • sandpaper
    • pencil
    • tape measure
    • painter's tape
    • 2" chip brush
    • screwdriver
    • 1" painter's tape
    • clean cloth
    • drawer pull
    • miter saw
    • wooden board
    • screws
    • drill gun
    • drill bits
    • plywood
    • Washi masking tape
    • Kreg Jig
    • pocket screws
    • caster

    INSTRUCTIONS

    NOTES:

    Let dry completely between painting steps.

    The finished size of each drawer is 24” x 36”. Before beginning, measure the height of the bed frame from the floor to the lowest rail. This will tell you how tall you can make the drawer.

    1. Cut two 24" long pieces of wood board from the 1" x 6" pieces.
    2. Cut two 34-1/2" long pieces from the 1" x 6" pieces. Use the Kreg Jig to add two pocket holes on both ends of the boards.
    3. Use the 1-1/2” coarse pocket screws to screw the shorter boards onto the ends of the longer boards. (See photo.)
    4. Instruction #3
    5. Use the 1-1/2” coarse pocket screws to screw the two halves of the box together.
    6. Cut three 24" long pieces from the 1" x 4" board. Use the Kreg Jig to add two pocket holes on both ends of all three boards.
    7. Instruction #5
    8. The height of the bed frame from the floor to the lower most rail as well as the height of the casters will determine the position of the 24” long 1" x 4" pieces that will make the bottom rails. Measure the height of the bed frame from the floor to the lower-most rail and the height of the casters from the bottom of the wheel to the top of the mounting plate.
    9. Use a tape measure and a pencil to measure from the top edge of the box down on the inside and place a mark at the dimension you calculated in Step 6. Insert the three 24” long bottom rails and use the 1-1/2” coarse pocket screws to screw the boards into the sides of the drawer.
    10. Instruction #7
    11. Use the 1/2” long screws to attach the casters onto the bottom rails. (See photo.) Flip the drawer over so it is resting on the casters.
    12. Instruction #8
    13. Cut the 1/4” thick plywood to 22-3/8” x 34-3/8”. Insert the plywood in the bottom of the drawer and use the six 1/2” long screws to secure the plywood onto the three bottom rails.
    14. Instruction #9
    15. Use the 3/16” drill bit to drill the holes on the 24” wide side for the drawer pulls. (Do not add the drawer pulls yet.)
    16. Sand all edges of the surfaces as needed to remove any splinters or rough edges. Wipe away the sanding dust with andamp paper towel.
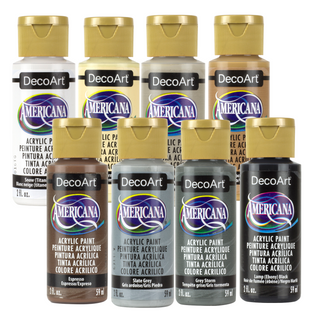
    17. Now that the drawer is assembled, paint the inside and outside with one coat of Vintage. Allow the paint to dry completely.
    18. Starting from the bottom up, apply 1-1/2” wide painter’s tape around the bottom of the drawer. Leave a space and add the 1” painter’s tape around the outside of the drawer. Leave a space and add approximately 1/2” wide Washi tape around the outside of the drawer. Press down the edges of the painter’s tape really well to prevent paint from bleeding underneath.
    19. Instruction #13
    20. Paint the outside and the top edge of the drawer with Everlasting. Pull off the painter’s tape before the paint is completely dry. Allow the paint to dry completely.
    21. Instruction #14
    22. Optional: Use sandpaper to distress the edges as desired.
    23. Use a clean cloth to rub Americana Décor Clear Crème Wax all over the inside and the outside of the drawer to protect the paint finish.
    24. Add the drawer pulls onto the front of the drawer.