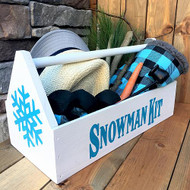
Winter Snowman Kit Box
Posted by DecoArt on Nov 7th 2017
Outfit the snowman-making crew with a fun kit using Americana Decor® Outdoor Living™.
SUPPLIES
- water container
- paper towels
- stylus or pencil
- transfer paper
- sandpaper
- 2" flat brush
- #1 and #2 round brushes
- 1" angled brush
- rectangular wooden box with handle
INSTRUCTIONS
NOTES:
Allow the paint to dry fully before continuing to the next step.
- Sand any rough edges.
- Paint the box with Picket Fence. Add a second coat of paint, if needed. Let dry completely.
- Choose one of the longer sides of the wooden box to transfer the "Snowman Kit" word pattern. Lay the transfer paper, shiny side down, against the box. Center and lay the printed pattern on top of the transfer paper. (Tape the edges of the paper to hold it in place.) Use a pencil to trace the image: Apply gentle pressure as you trace to ensure that the image is transferred successfully. Transfer the snowflake design to both short ends of the box.
- Use a small paintbrush to fill in the transferred pattern: Paint the inside of the box with Rock Garden using the 1" angled brush. Fill in snowflakes and text with Turquoise Sky. Let dry completely.
- Gather and fill the box with your favorite snowman-making supplies.


