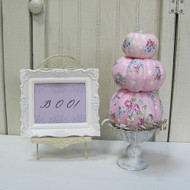
Decoupaged Shabby Chic Pumpkin Topiary
Posted by DecoArt on Sep 20th 2015
Give a Halloween party table a chic look with a topiary of stacked, decoupaged pumpkins.
SUPPLIES
- water container
- palette or plastic plate
- paper towels
- sandpaper
- scissors
- 2" chip brush
- hot glue gun and glue sticks
- 1" foam brush
- clean round pencil eraser
- sheet music
- dried Spanish moss
- assorted scrapbook paper
- pumpkins
- glitter
- urn
INSTRUCTIONS
NOTES:
Let dry completely between painting steps.
- Clean the pumpkins thoroughly with a damp paper towel. Remove the stems from the two larger pumpkins, leaving the stem in the smallest one.
- For the largest pumpkin, mix equal parts Light Buttermilk and Pink Cadillac. Apply two coats, using a 1" foam brush. For the medium pumpkin, paint with a mix of (3) parts Light Buttermilk to (1) part Pink Cadillac. For the smallest pumpkin, paint with a mix of (4) parts Light Buttermilk to (1) part Pink Cadillac.
- Using fine grit sandpaper, lightly distress the pumpkins, if desired. Wipe clean with a paper towel.
- Using a chip brush, paint the urn with a light coat of Buttermilk. Allow some of the original color to show through.
- Using sandpaper, lightly distress the urn. Wipe clean with a paper towel.
- Cut out floral images from the scrapbook paper.
- Brush the back side of the cut-out images with Americana Matte Decou-Page and place them on the pumpkins in a desired pattern. Press out any wrinkles gently with fingers. Apply another layer of Decou-Page on top.
- Use the handle end of the brush or a clean pencil eraser to add polka dots in Buttermilk to each pumpkin.
- Brush Decou-Page onto one pumpkin at a time. While still wet, sprinkle liberally with a clear glitter.
- Gather a few pieces of vintage sheet music or scrapbook paper. Using a paper cutter or scissors, cut into long, narrow strips.
- Using the sharp edge of the scissors, carefully run over the length of each strip of paper to curl.
- Add a bit of Spanish moss to the inside of the urn using hot glue and add the curled sheet music around the inner edges. Use hot glue to attach the largest pumpkin, followed by medium size, and then the smallest. (See photo for placement.)


