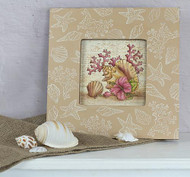
Seashell and Coral Still Life
Posted by DecoArt on Jul 26th 2016
Create a still life with a summertime theme with this coral framed in seashells.
SUPPLIES
- palette or plastic plate
- scissors
- #3 round brush
- 1" flat brush
- 1/2" flat brush
- 1/4" flat brush
- #0 round brush
- cardstock
- letter stamps
- cosmetic sponges
- wooden frame
- double-sided, repositionable tape
- 1 1/4" flat brush
- #00 liner brush
- Stampendous Die Cut Set DCS5090
- Cling Seashell Set CRS5090
- Hibiscus Conch Stamp
- Vintage Letter Stamp
INSTRUCTIONS
- Base the wooden frame with Cocoa and Light Buttermilk (1:1) and the insert with Light Buttermilk. Coat all items with one coat of Matte Varnish.
- Cut the shells and coral from the cardstock using the die cut set. Set to the side. Stamp the hibiscus conch stamp onto the cardstock using Burnt Umber; cut out using detail scissors.
- (Refer to the photo for placement of all impressions.) Place the small, lower-left shell stamp onto the acrylic handle. Dampen the sponge and remove as much water as possible. Load with Burnt Umber. (See helpful hints below.)
- In the same manner as Step 3, impress the hibiscus conch stamp.
- Using double-sided tape, tape the cut-out coral, conch, and shell over the matching impressions. Stamp the coral image to the left and to the right of the conch with Burnt Umber. Immediately clean the stamps with hot, soapy water.
- Apply the cardstock mask over the coral on the insert. Stamp the vintage letter stamp over the entire insert using a 1:1 mix of Cocoa and Light Buttermilk. Lift the masks.
- Using a plastic palette or plate, place about a dime-size drop of Coral Blush, Moon Yellow, Terra Coral, and Hauser Light Green in individual bubbles. Mix each paint with water 1:3, completely mixing the paint until it becomes transparent.
- Use a flat shader and/or #3 round brush, to apply the Terra Coral wash to the background coral.
- In the same manner, apply the Moon Yellow wash over the conch, leaves, center of flower, and small shell.
- Apply the Coral Blush wash over the hibiscus.
- Wash over the leaves and flower stamen with the Hauser Light Green wash.
- Float to shade the coral with Terra Coral; the shells with Cocoa; the leaves with Hauser Light Green; and the hibiscus with Coral Blush.
- Float Cocoa as the shades under the still life.
- Using a #0 round brush, add the highlights by dry-brushing White Peach to the coral and flower; Light Buttermilk to the shells; and, if necessary, Moon Yellow to the leaves and stamen.
- Re-inforce the shades to the coral with a 1:1 mix of Burnt Umber and Terra Coral; the shells with Burnt Umber; the leaves with Hauser Medium Green; and the hibiscus with Watermelon Slice.
- Add a 1:1 mix of Watermelon Slice and Burnt Umber to the darkest areas of the hibiscus.
- Float a 1:1 mix of Cocoa and Burnt Umber to darken the shadows. Also use this mix to base the inside and outside edges of the frame.
- To add the pattern to the frame, load the coral stamp with Light Buttermilk and press onto the frame in the lower right corner.
- Re-load and repeat the impressions. (Refer to photo for placement.)
- Using the other shell stamps in the same manner, create a pattern to the outer frame.
- Allow the paint to cure for 24 hours.
- Apply Matte Varnish to the entire frame and insert. Let dry.


