Mixed Media Made Modern
Posted by DecoArt on Jun 25th 2017
If you’re anything like me, the term “Mixed Media” makes you a bit nervous. You’re not sure about all those techniques and you’re not confident about how to mix different materials and textures. Well, it turns out that “Mixed Media” can be as modern and contemporary as you want it to be!
Items Needed:
- DecoArt Media Mediums and Specialty Products - Modeling Paste - White (DMM21-71)
- DecoArt Media Mediums and Specialty Products - Clear Matte Medium (DMM20-71)
- Americana Decor Stencils - Tropical (ADS207-K)
- A Notebook
- Patterned Paper
- Wood Alphas
- Palette Knife
- Washi Tape
- Craft Glue
Instructions:
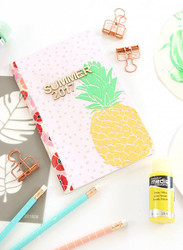
Today, I’m diving into a few of my favorite DecoArt Mixed Media tools to create a simple but impactful summer journal.

It’s hard to pick a favorite DecoArt Mixed Media product, but the Fluid Acrylics. They mix so beautifully and the intense pigment means you only need a drop or tw! Let me show you how I used Fluid Acrylics to create my notebook.

First let’s cover our notebook!
STEP ONE: Brush Matte Medium over the cover of your book. This product works great as an adhesive with paper. Sort of like Decoupage, but even more sheer and brushable.


STEP TWO: With Matte Medium in place, cover the front and back of the notebook with patterned paper and use scissors to remove the excess.

STEP THREE: Add a strip of washi to the spine to give your book a finished look.
Now it’s time to break out some more Mixed Media goodies!


STEP FOUR: Place some Modeling Paste onto a paper plate then add color. For the perfect pineapple shade of yellow, I added two drops of Primary Yellow and one drop of Cadmium Orange, then mixed with my palette knife.


STEP FIVE: Place the stencil onto your journal, then apply a thin coating of tinted paste. Smooth as you go to get even coverage. Continue adding color to the top of the pineapple stencil.

STEP SIX: Remove the stencil you reveal a beautiful dimensional design! Modeling Paste adds the perfect amount of texture to any paper crafting project.

STEP SEVEN: Once the paste is dry, use your favorite craft glue to adhere the wood letters.


