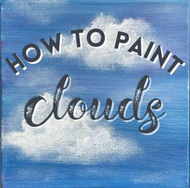
How to Paint Clouds
Posted by DecoArt on Oct 5th 2021
Learn how to paint simple clouds for a lovely addition to any sky painting.
SUPPLIES
- 6x6 canvas panel
- 1" Flat Brush
- 12 Dome Blender Brush
INSTRUCTIONS
- Using the 1" flat brush, start by painting your sky with the desired colors. I used True Blue, Baby Blue, Lavender, and a touch of White to get a pretty sky color. Try experimenting with your own favorite colors to create your sky! For the best results when painting clouds, softly layering the paint is key. Start with a transparent layer and build up the color to create depth and shape.
- Load a small dome blender with some Titanium White and wipe any excess paint off on a paper towel. (A little can go a long way, and you can always add more paint.) Using a light touch, and small, circular motions, to create a very loose circle shape on the sky. Continue to spread the paint out as thin as you can in all directions to create a wispy, soft cloud. You want the edges to have a hazy, transparent look to them. Avoid going straight up like a mountain or leaving harsh edges or lines on the clouds. Try not to make them too uniform either, think of the many shapes clouds take and get creative. Loosening up on the brush as you paint clouds helps as well. The soft circular motion will help keep the paint soft and airy. Keep pushing the paint out as far as you can. As you’re almost out of paint on the brush, dry brush some clouds in the sky here and there.
- Painting the thin, wispy, and mostly transparent layer allows the background to help create shadows on the clouds. Doesn't that look neat?
- Think about where the light source is coming from and use that to determine which part of the cloud will be the edge. On these clouds, it’s coming from the left. Reload the brush, wipe off the excess, and loosely draw in an edge on the cloud. Wipe off the brush and using a soft circular motion, fade out the right edge. Skip a little space, and add another edge with a brighter white. Wipe off the brush and again, soften the right edge out into the cloud. The space you leave in between will create shadows which creates depth to your clouds.
- If you lose the shadows, don't be worried! You can simply add a touch of blue and white to your brush, wipe off the excess, and using the soft circular motion, paint them back in like so. Acrylics are a very forgiving medium which is what makes them great for beginners. If you're struggling to picture where shadows on a cloud should go, try looking at a photo as a reference.
- And there you have it! You're ready to start painting your own fluffy clouds. All you need is a canvas, your favorite colors of the sky, and some paintbrushes. The best part about clouds is no two are alike! I hope you will practice painting all kinds of clouds using this tutorial as a guide.


