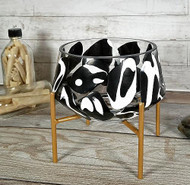
Retro Glass Bowl
Posted by DecoArt on Apr 19th 2020
Give a glass bowl and stand a designer look with DecoArt® Glass Paint.
SUPPLIES
- paper towels
- rubbing alcohol
- masking tape
- freezer paper
- glass bowl with stand
INSTRUCTIONS
- Wipe the glass bowl surface with rubbing alcohol to remove oil and dirt.
- Gather the White and Black DecoArt Glass Paint.
- Lay out a sheet of freezer paper approximately 2.5' long on a flat, smooth surface. Tape down the edges with masking tape to keep the paper from rolling up. Shake the paints thoroughly. Drop various sizes of drops of Black evenly spread out over the freezer paper surface.
- Drip White onto the black circles. Pop any bubbles with fingers or blow on lightly.
- Do another drop of Black into the center of the White. (Make more puddles than you think you will need to have choices when applying to the glass bowl.)
- Untape one edge and gently place a hand under the paper to lift it, letting the paint drops move and smooth out.
- Continue this process until there is visual interest and the paint is evenly distributed (but not too thin).
- Let dry overnight. Look at the Glass Paint "skins" and decide where to place them on the glass bowl. Peel the paint skin carefully off the freezer paper.
- When placing onto the glass, press the paint skin onto the surface evenly, stretching and smoothing it out with fingers. Your goal is to have not air under the paint skin and to have all edges affixed to the glass.
- Continue placing the paint skins around the surface until your desired design is achieved. Bake the bowl in the oven following the instructions on Glass Paint bottle. (This will affix the paint and allow you to use the piece functionally and not just decoratively.)


