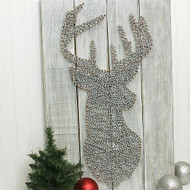
Deer Head Silhouette Twine Art
Posted by DecoArt on Dec 8th 2015
A deer head silhouette, made with Americana Decor® Chalky Finish, adds a woodlands accent to winter décor.
SUPPLIES
- water container
- paper towels
- sandpaper
- 2" chip brush
- cloth
- staple gun
- wood glue
- hammer
- vinyl
- Silhouette electronic cutting machine
- twine
- nails
- wooden board
- wood stain
INSTRUCTIONS
NOTES:
Let dry completely between painting steps.
- Cut (4) pieces of wooden board 1" x 4" x 22". Slightly round the board edges by sanding them.
- Stain the (4) pieces in a dark stain of choice following the label instructions.
- Line up the (4) boards. Use a quarter between each board to space them evenly.
- Apply wood glue to the back of the scrap pieces of wood.
- Place the glue side down on the wood and staple together. If needed, hammer the staples in until they are flush.
- Turn over and paint the face of the planks with a light coat of Lace. Let dry.
- Once dry, lightly sand so that the stain color shows through slightly. Wipe away any sanding dust with a damp paper towel.
- Cut out a stencil on the Silhouette machine from the provided file. Apply the vinyl stencil in the center of the panel.
- Begin hammering the nails following the edge of the stencil. Space nails about 3/8" apart. (These don't need to be perfect.)
- Continue until the entire silhouette is done.
- Remove the vinyl stencil.
- Tie the twine on a nail. Begin going from nail to nail, looping around them as you go.
- Finish the silhouette by going around all of the outside nails. Start the loop by going in front of each nail head and then looping around. Continue until you reach the beginning point again.
- Tie off the twine using another existing string. Tuck in the end so that it blends in with the other strings.

