
DIY Wooden Wall Art
Hey friends! Thanks for stopping by today! Don’t forget to come find me on Instagram, Facebook and Pinterest and sign up for the newsletter….You’ll be able to keep up on the latest happenings around our home and family!
***************************************************
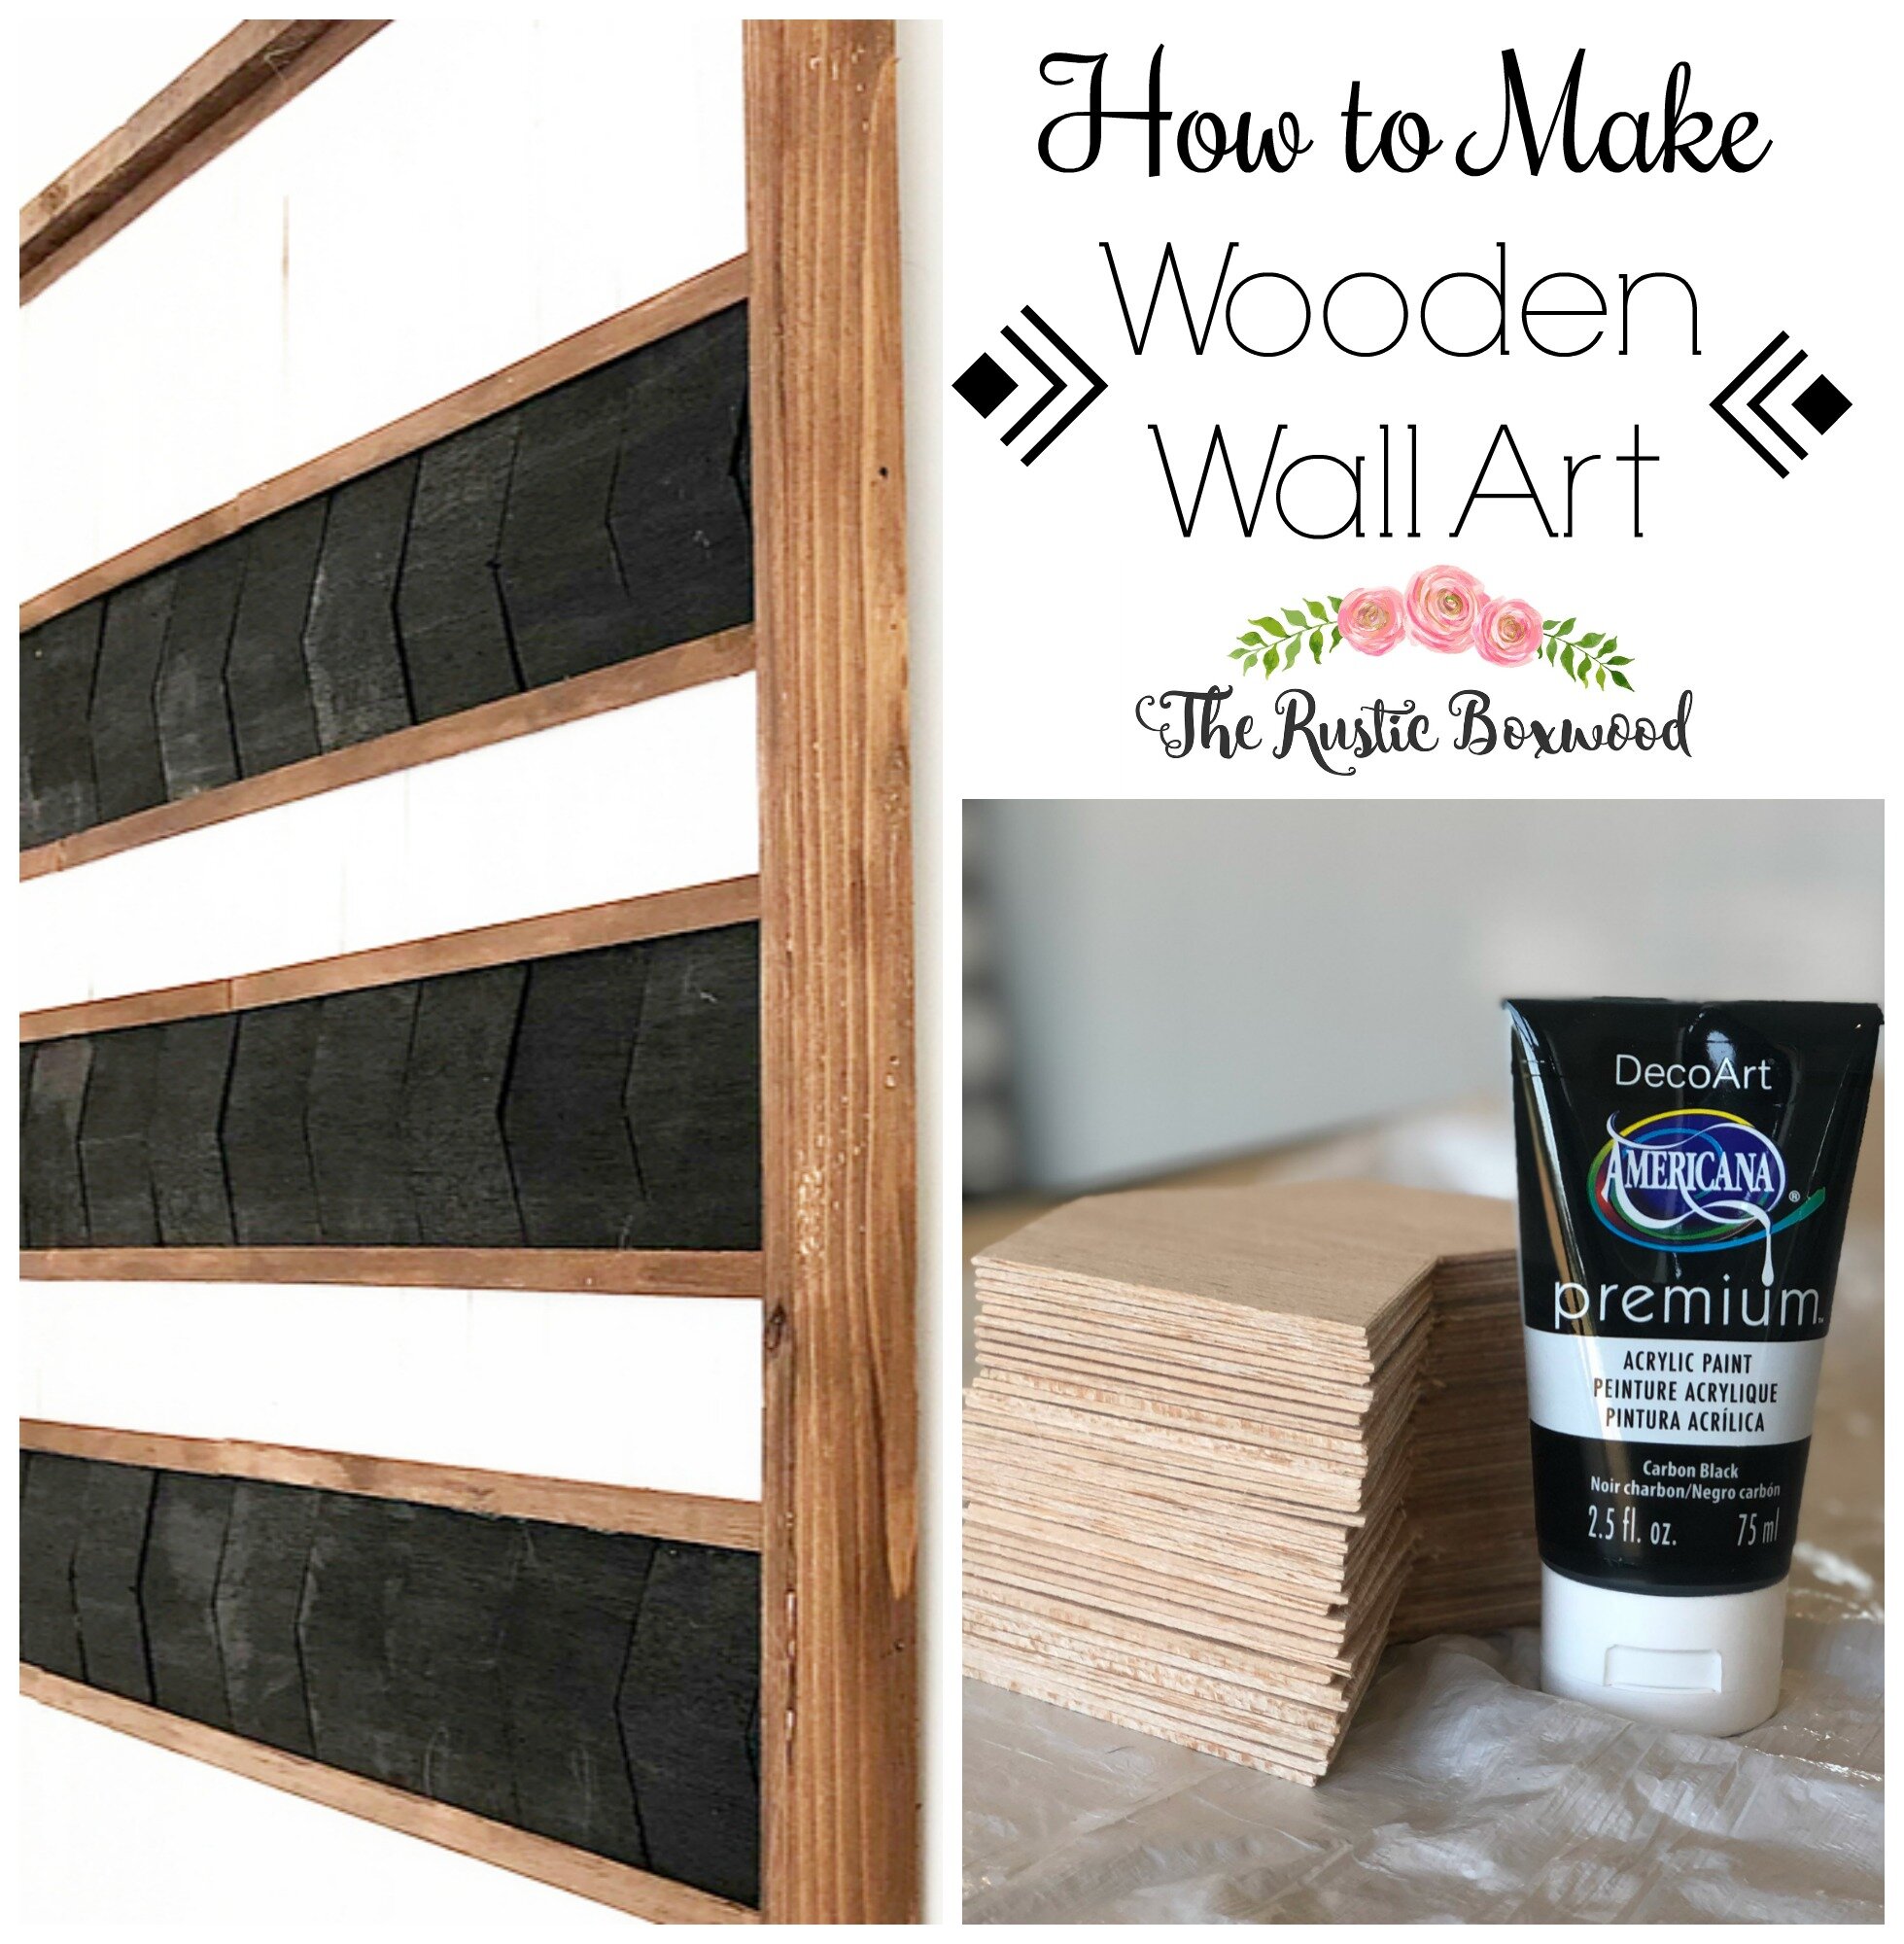
Today, we're going to talk all about how to make some beautiful wall art for your home, at a fraction of the cost! For the longest time, I've wanted to design some tribal wall art, and I finally had the excuse to set aside time to make it happen! Woohoo!
But first, while we're on the subject of making some home decor, I wanted to mention that the amazing DecoArt team has invited me to join them for my second year as one of their Core Bloggers! What??!! Yaas! 🙌🏼🙌🏼🙌🏼 I'm so honored and thrilled to be on their team of contributors again this year! And that means I get to make some fun decor using their products every other month, starting with this post! So, be sure to check back the 1st of every other month throughout this upcoming year to see more DecoArt projects. (You can check out all my previous collabs with them by searching "DecoArt" on my home page, and you'll see all sorts of projects.)
Speaking of DecoArt, for this month's project, they'd asked that I create something for the wall using their acrylic paints.
I chose just a few colors, and I love how this project turned out! Here's what you'll need:
Acrylics -- Carbon Black, Translucent White, Titanium White
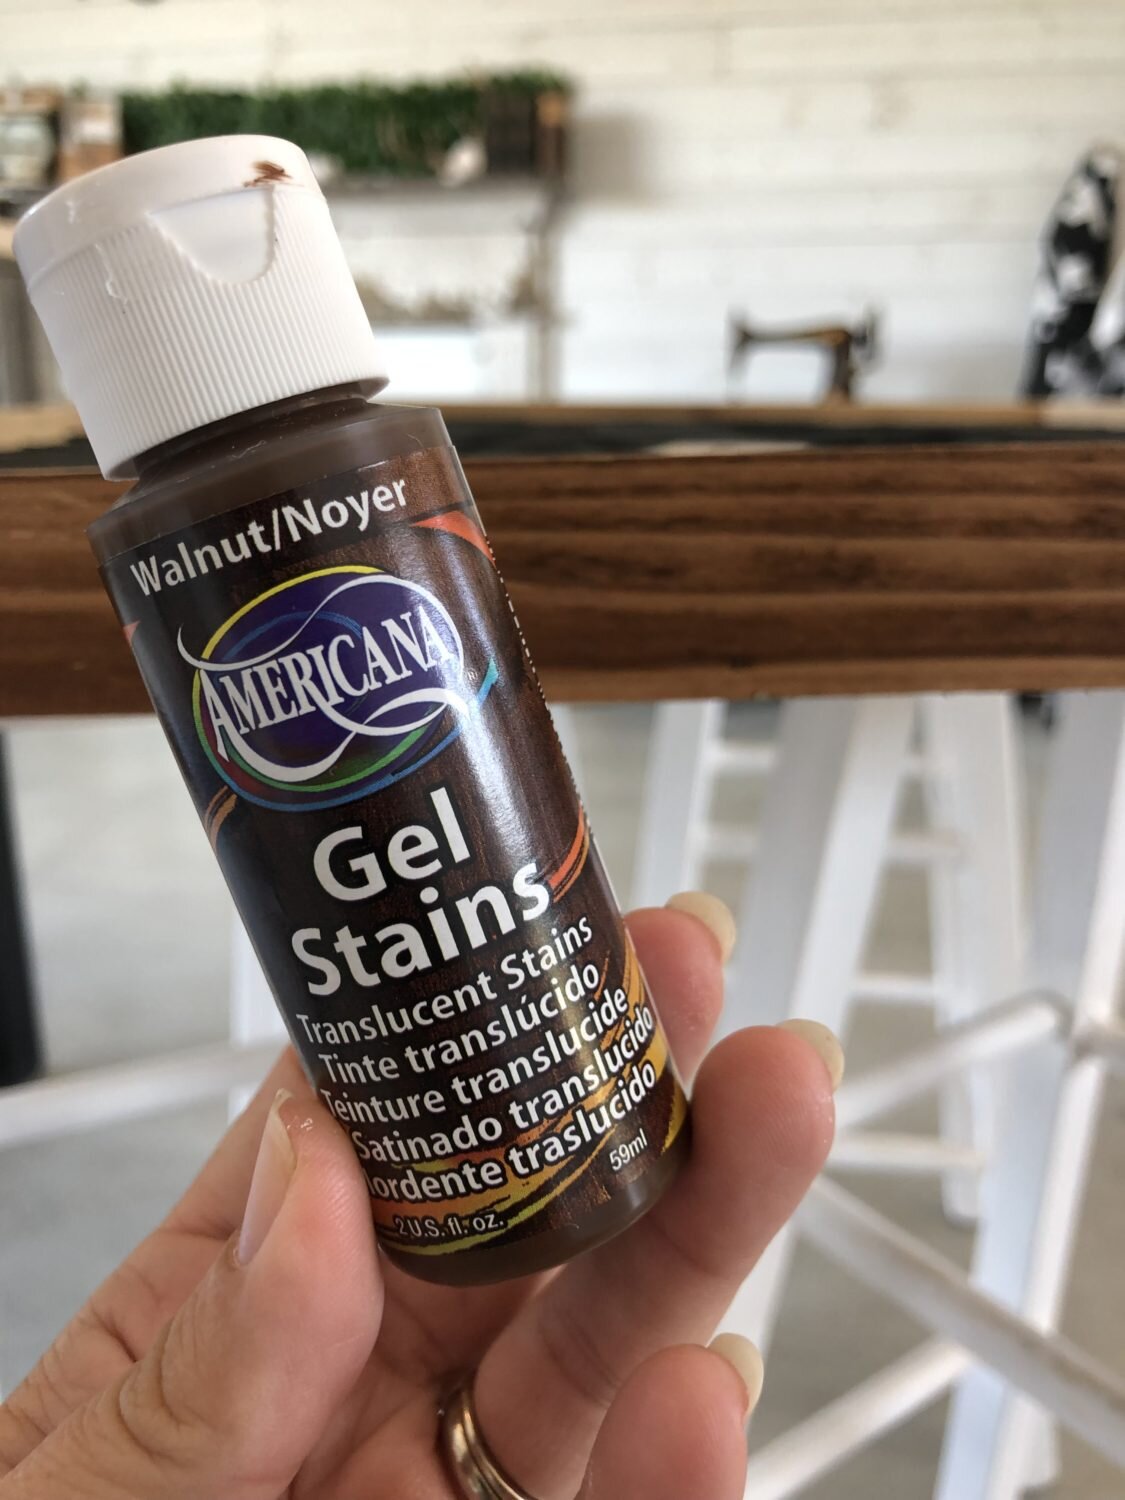
Americana Gel Stain -- walnut
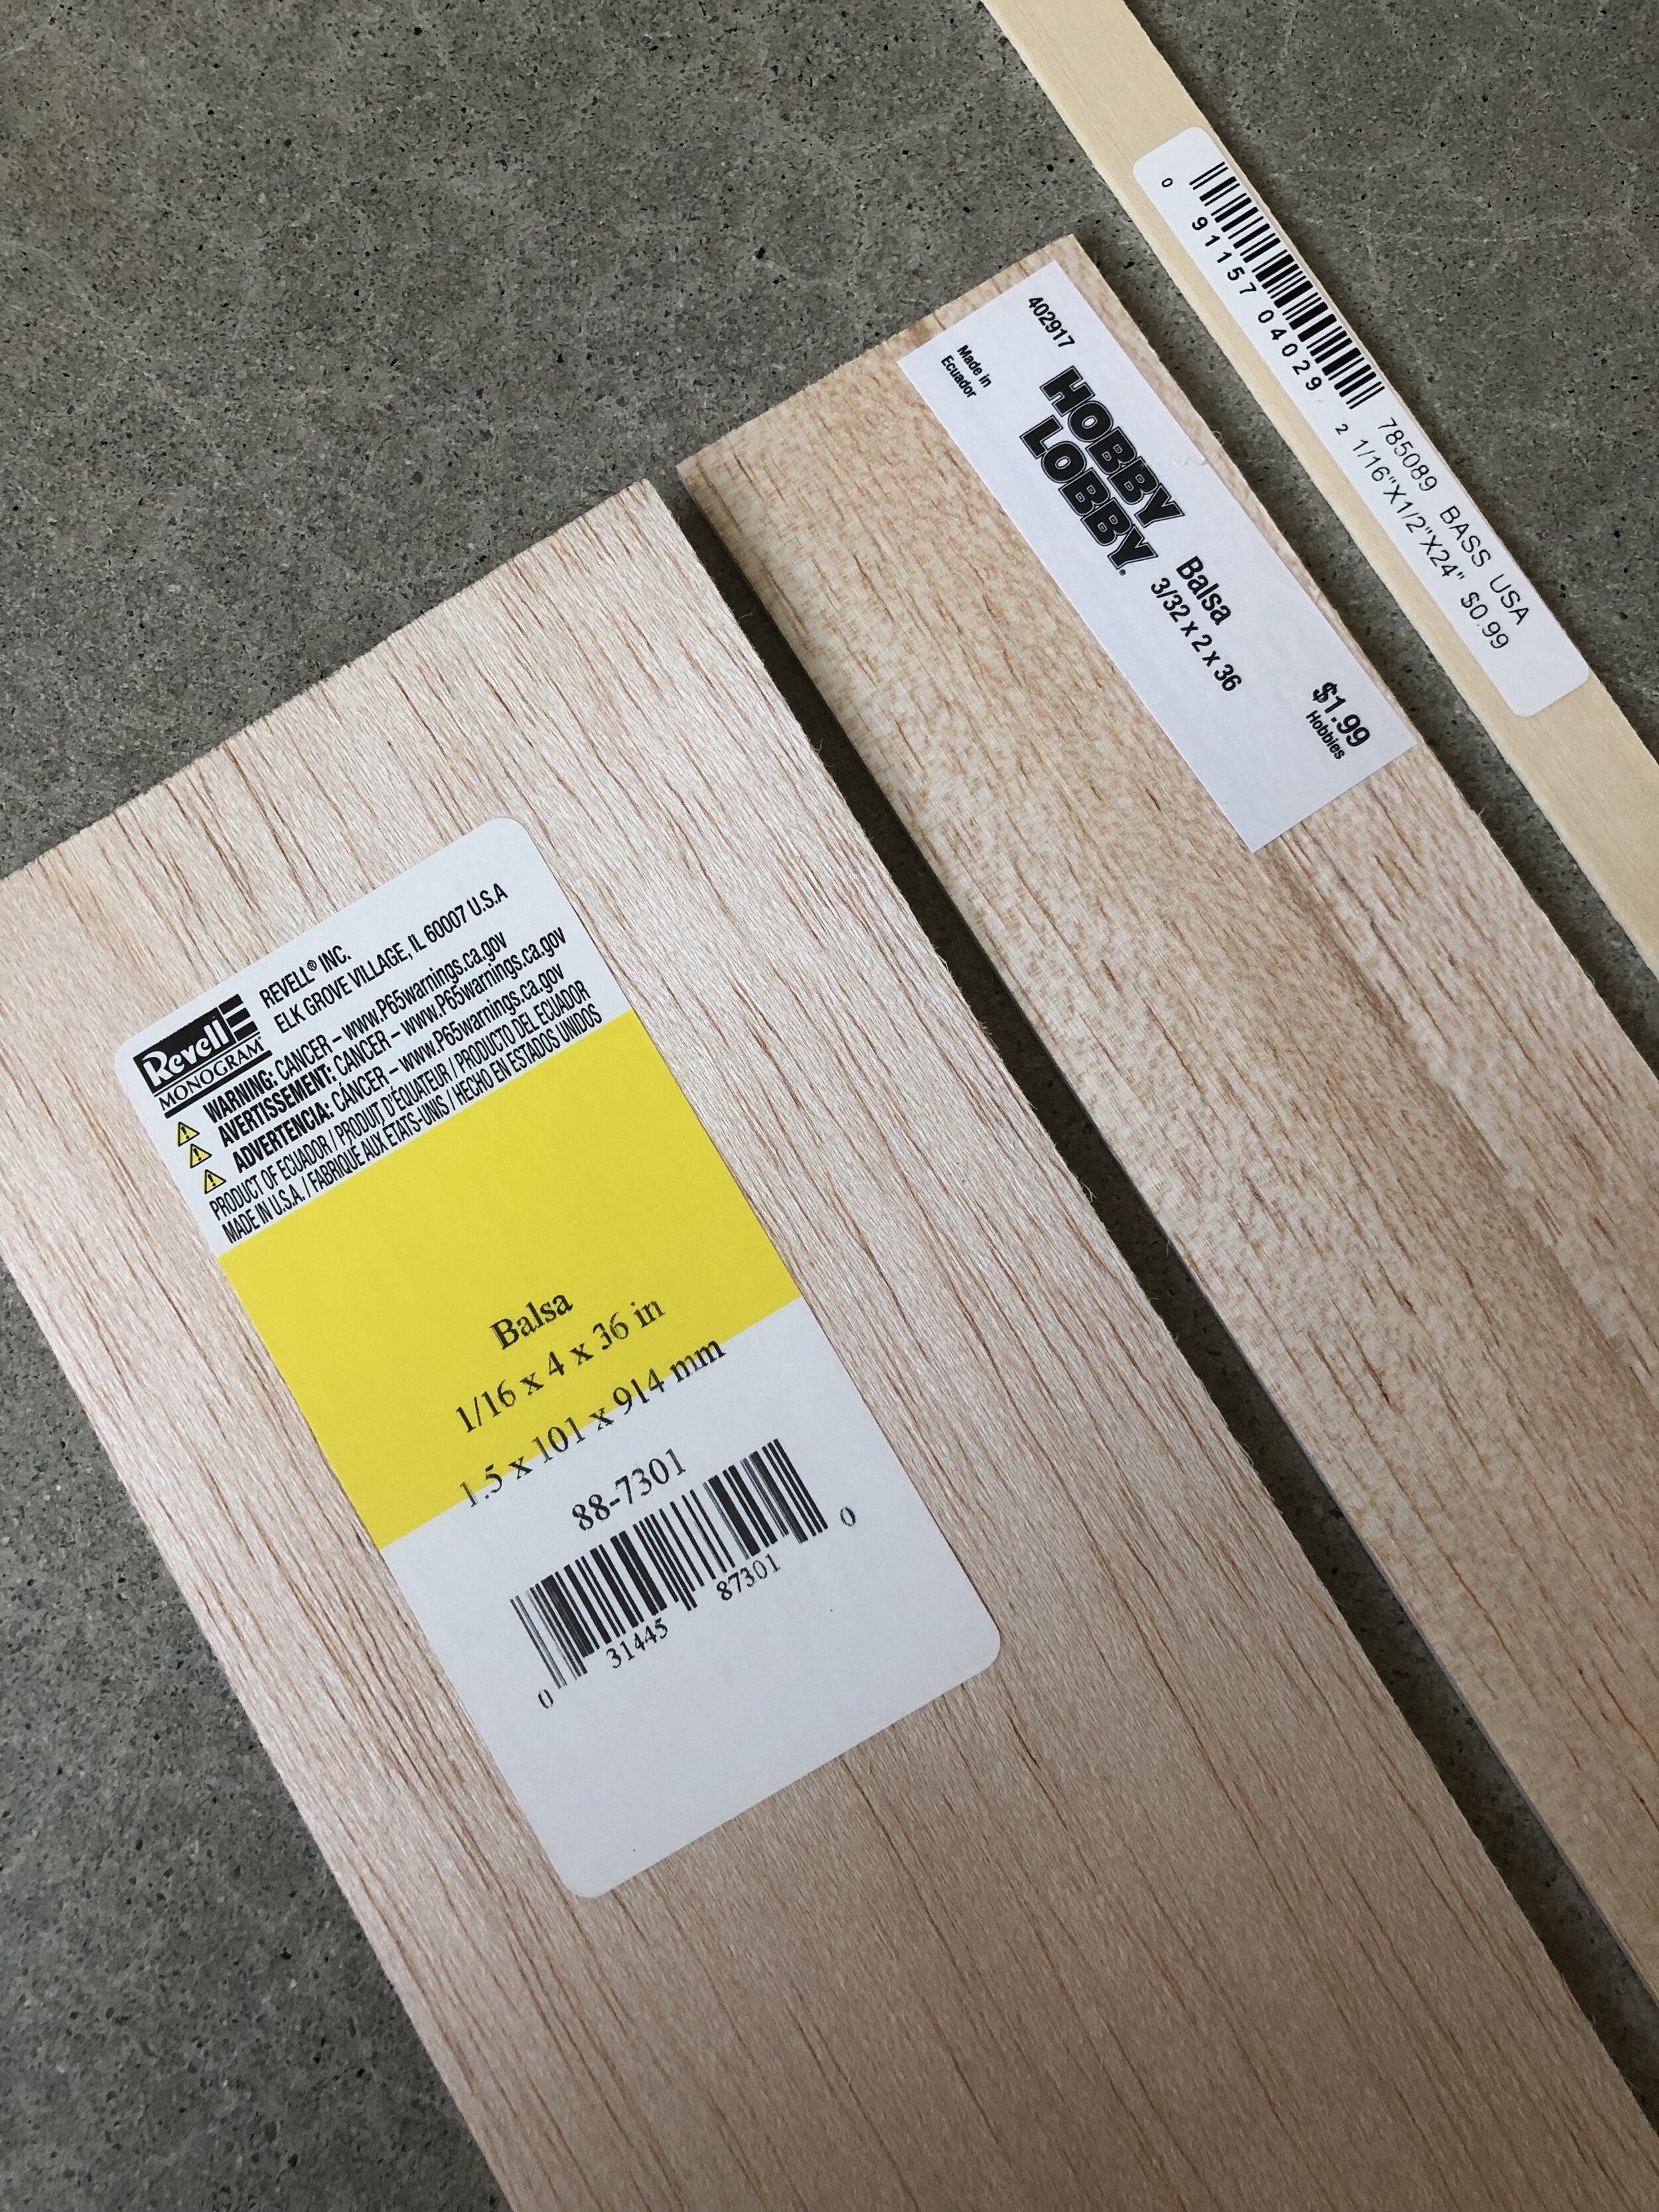
Balsa wood (found at your local crafts store) -- I used the 3 sizes in the pic below.
scissors, pencil and ruler
sponge brushes, paper plates, paper towels (or something for any mishaps)
hot glue gun and hot glue sticks
oversized frame
Regarding the frame that I chose, I didn't want to spend an arm and a leg, so I scoured some thrift stores for one that was large AND cheap! LOL.

Finally, I found the perfect piece at a thrift store. It was only $2 and was huge! It also already had the hanging attachments AND the unfinished, wood frame (which was just what I wanted!)! Double score!
Of course, this project is meant to inspire you to create your own beautiful work of art, so if you don't find a frame that's unfinished, that's totally okay. You could paint the frame, or you could look for just a canvas and not worry about a frame....That's what I love about repurposing. You can just go with what you've got and use your noggin to design something incredible and all your own!
Let's begin!
First, figure out the layout of your design, and then measure and start cutting all that balsa wood. I used a pencil and ruler to draw out my design on the balsa wood. Once the first piece was cut, I used it as my "stencil" to trace the rest of the pieces.


Be careful with cutting, because the balsa wood is quite thin and can easily break. I used a larger-than-normal pair of scissors to help with cutting from one side to the other to prevent any rips or tears, but of course, you can just use regular-sized scissors. (Sidenote: I've found that the wood won't break as easily if the pieces have been painted first before being cut.)
Once you've completed all that cutting, the next thing to do is start painting the cut pieces and the frame. I stained my frame first, then painted the cut pieces, and lastly, stained all the edge pieces. Be sure to paint the sides of each cut piece, so that any unfinished edge won't show through.
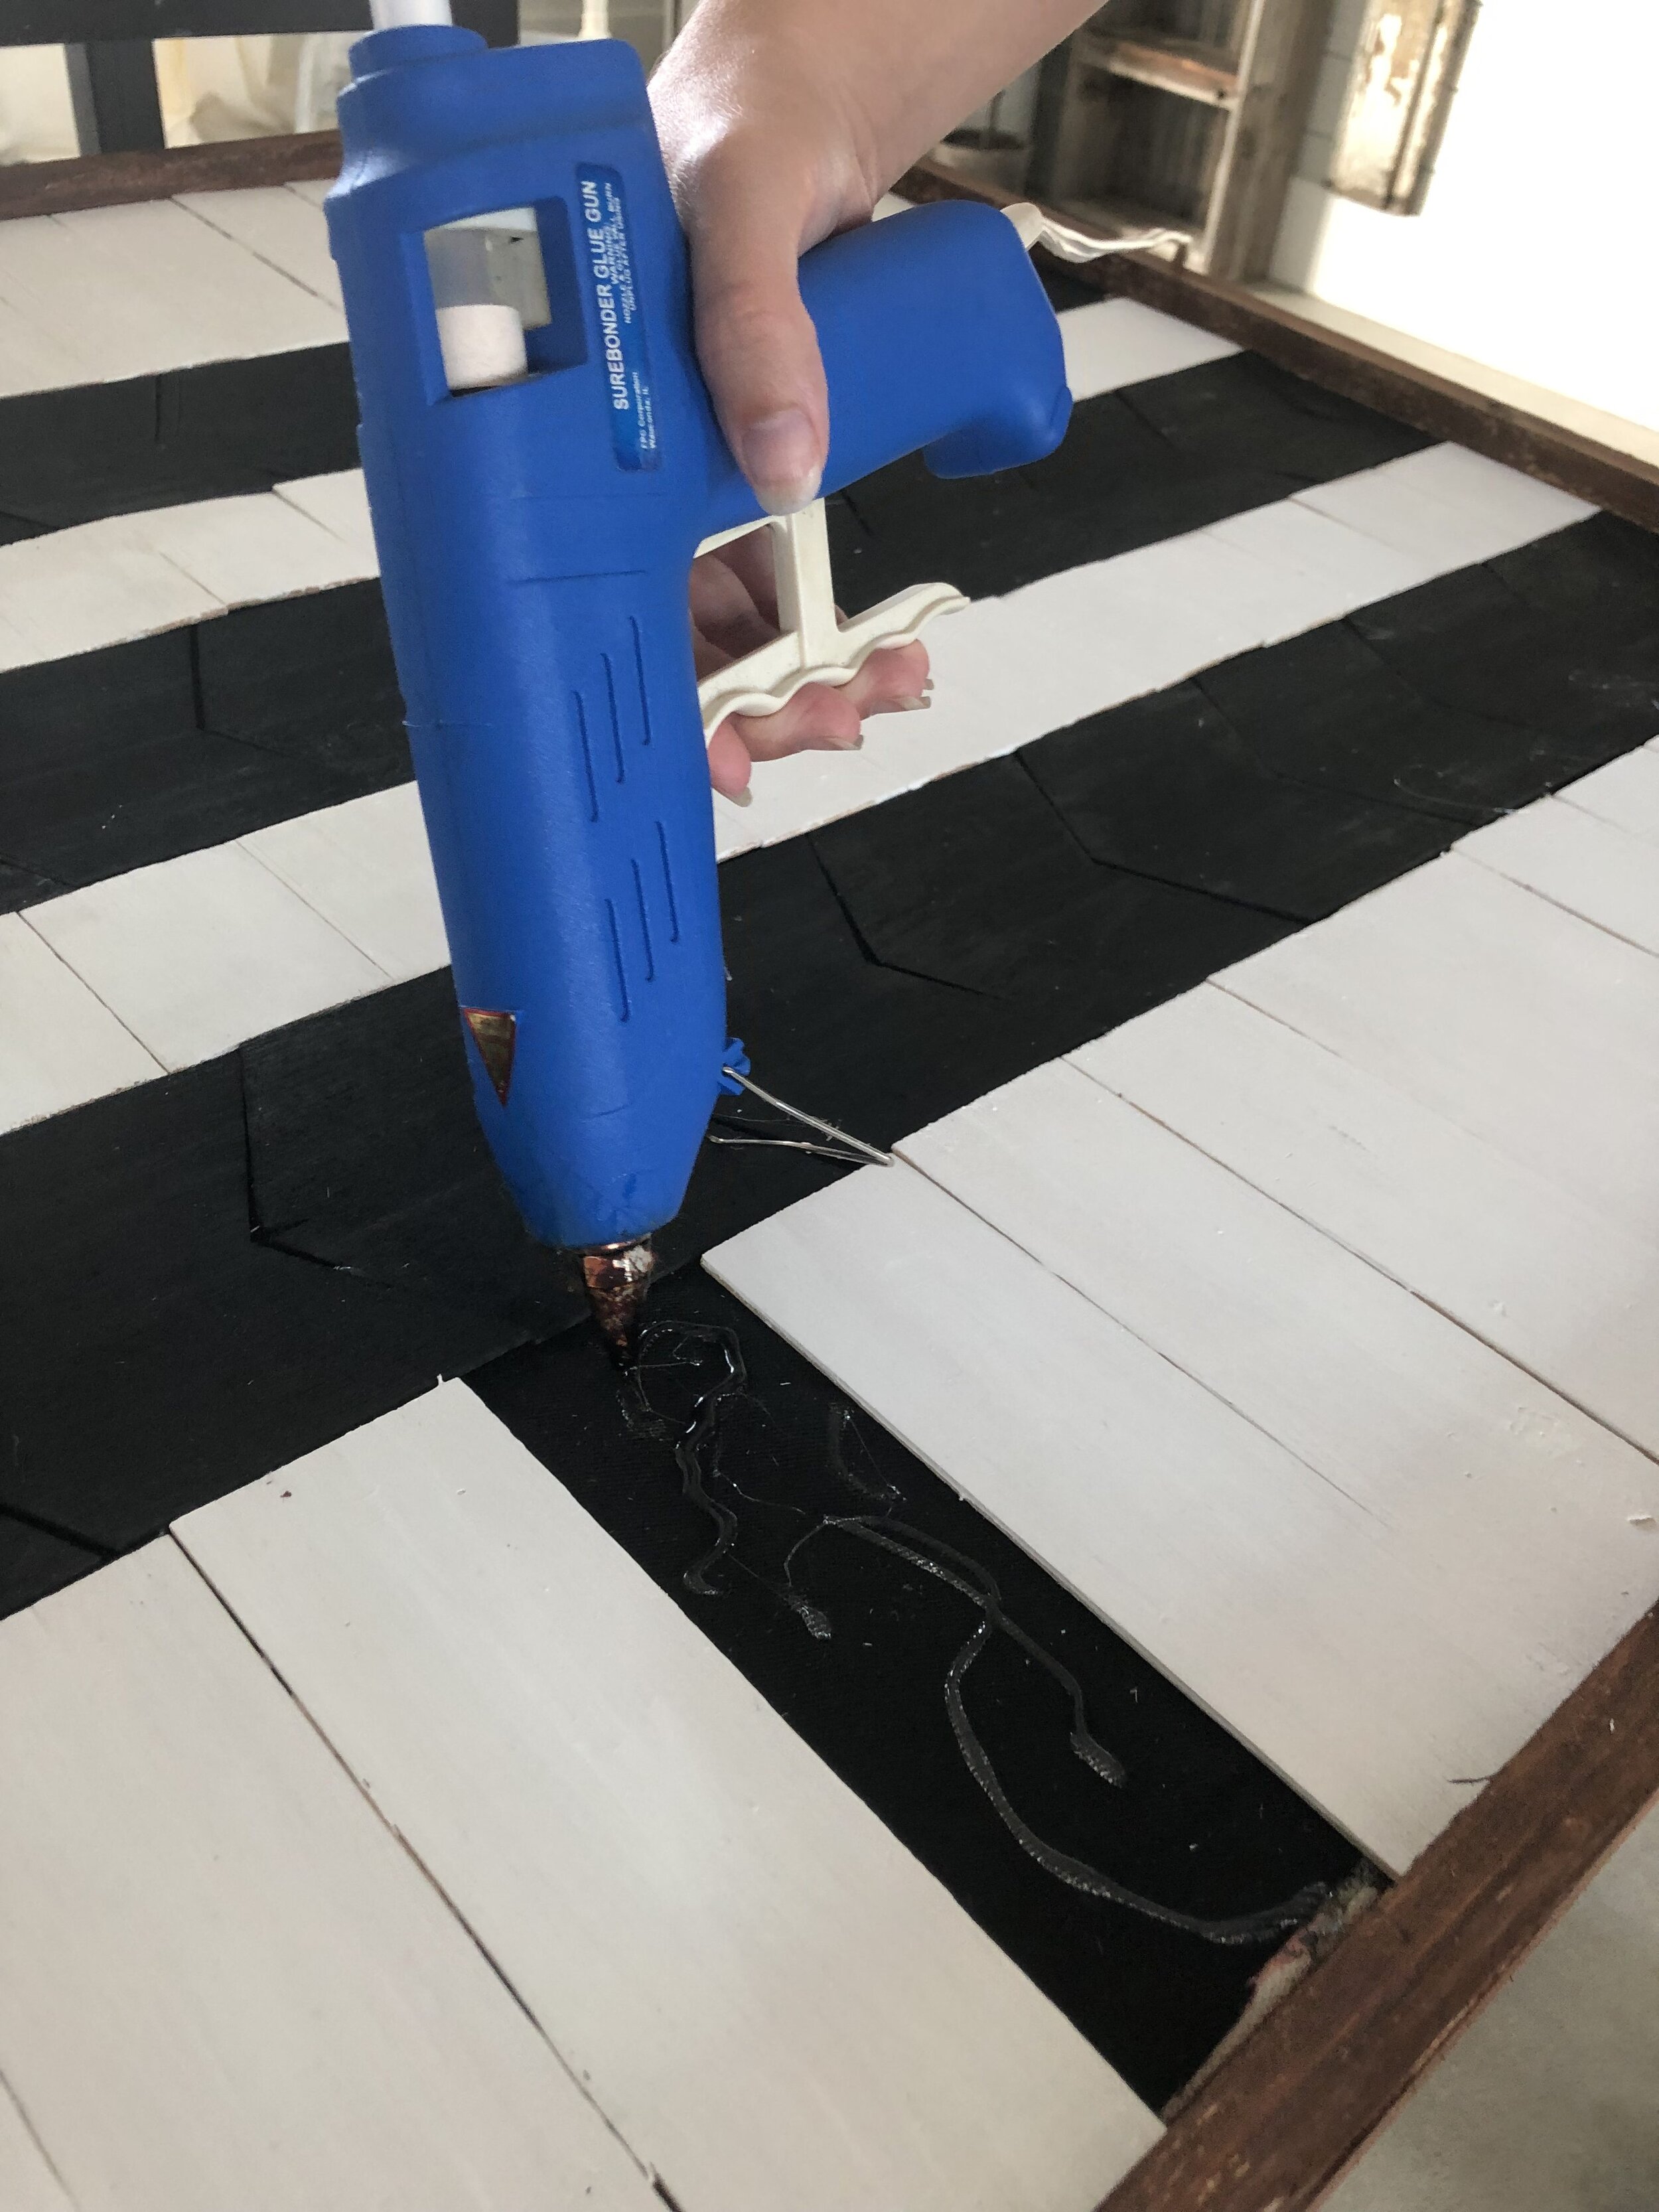
After the paint dries (which is very quickly), use some hot glue to attach the wood to the frame. But before you do any glueing, make sure your background won’t show through the cut pieces. So, to do that, I attached a black piece of scrap fabric to the inside of the frame (i.e. underneath the balsa wood). This step made the background completely invisible, so if, in the case where the edges weren’t exactly straight, it’s hardly noticeable...thank goodness!
Next, to give all those cut edges a finished look, I stained some thin pieces of wood and then hot-glued them to wherever the pattern changed.

By the way, just as the paint had a speedy dry time, so did the stain, which is a huge plus in my book!
Here she is! What do you think? I love the contrast that the design makes, and I love how well the paint/stain adhered to the wood!


Thanks again for stopping by today....I appreciate each one of you! ❤️ Have a wonderful day!
You might also like:


