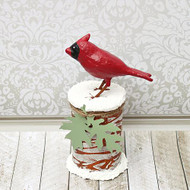
Cardinal in the Woods Cookie Container
Posted by DecoArt on Nov 16th 2015
Let the Woodland friends help deliver your holiday treats with cookie container created using Americana Multi-Surface Acrylics.
SUPPLIES
- water container
- palette or plastic plate
- paper towels
- scissors
- 1" flat brush
- 1/4" flat brush
- bottle or round container
- tissue paper
- cardstock
- palette knife
- twine
- paper mache shape
- paper punch
- air-dry paper clay
INSTRUCTIONS
NOTES:
Let dry completely between painting steps.
- With a damp paper towel, thoroughly clean the container. Using a 1" flat brush, paint the outside of the container in Cocoa Bean.
- Position and press the Gloss-Enamels Stick-On Safari (zebra) stencil on the can so the pattern is going horizontally. Use a palette knife to add Texture Sand over the stencil. Carefully remove the stencil while the product is still wet. Clean stencil and pat dry. Allow the Texture Sand to dry for at least one hour before repeating. Repeat as desired until the entire can is covered to create a bark-like texture.
- Paint the entire bird with Red Barn except the legs. Paint the legs in Cocoa Bean.
- Mold a small piece of air dry clay onto the crest of the bird. Let dry completely. Then paint with Red Barn.
- Cut a piece of black tissue paper into a rounded triangle shape. Cut out the center as shown. Then, cut the tissue paper in half lengthwise.
- Use Americana Matt Decou-Page to apply the top half of the tissue paper onto the bird. Repeat with the second half. Once dried, use the end of the brush to add two dots for the eyes in Cotton Ball.
- Using a palette knife, apply Snow Tex to the bottom of the container. Cover the lid with Snow Tex; while it is still wet, press the bird's feet into it and let dry for 24 hours.
- To make the gift tags, use a punch or digital craft cutter to cut out leaves from cardstock. Once cut out, paint in Cactus. Once dried, attach to can with twine.


