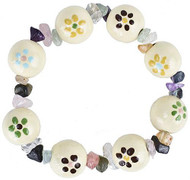
Painted Beaded Flower Bracelet
Posted by DecoArt on Feb 20th 2015
Stretchy jewelry cord makes creating the proper size bracelet a snap.
SUPPLIES
- water container
- palette or plastic plate
- paper towels
- scissors
- toothpicks
- #12 flat brush
- glue
- .5-mm jewelry cord
- beads
- wooden beads
- floral foam blocks
INSTRUCTIONS
NOTES:
Let dry completely between painting steps.
- To figure the size of the bracelet, unroll some jewelry cord from the spool, but don't cut it. Thread on a wooden bead, then three small beads, another wooden bead, and three more small beads, continuing until the bracelet is the desired length. Cut the cord. Remove the beads and set cord aside.
- Place two floral foam blocks on the work surface. Insert toothpicks into one foam block, about 1"-1/2" apart. Place one wooden bead onto each toothpick. Line up the open ends of the toothpicks with the second foam block and connect them. (This will give the beads a place to sit independently while you paint them.) Paint each bead Buttermilk.
- Use a toothpick to dot on flower centers, two on each bead (one on each side). Use a toothpick to add flower petals. (Vary the colors of the centers and petals to give several different flower options.)
- When all paint has dried, give each bead a coat of Triple Thick Gloss Glaze.
- Thread the completed beads and smaller beads onto the jewelry cord as in step 1 above.
- Pull the cord snug and tie it into a knot, re-knotting two or three times. Add a dab of glue to the knot.

