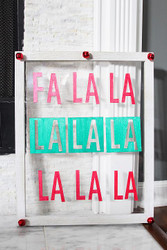
DIY Acrylic and Wood Christmas Sign
Posted by DecoArt on Nov 9th 2018
One of my favorite ways to decorate for the holidays is to repurpose my existing decor… basically, shop my house! Not only is it budget friendly, but it’s a fun way to transition decor rather than packing it up for the season until the next year.
I had such fun with my DIY Acrylic and Wood Sign that I decided I would remake it in a Christmas theme with some bling thanks to beautiful Dazzling Metallic paints.
Items Needed:
- Acrylics Or Glass Sign/frame
- Unfinished Wood Letters
- Paintbrush
- Adhesive Mounting Squares
Instructions:

If you’d like to cut your own letters using my cut file and haven’t cut wood before, you can find a tutorial for cutting wood with the Cricut here.
I chose the metallics in the traditional Christmas colors of red and green but don’t feel confined to the traditional! Choose whichever colors inspire you. Paint every other row in different colors to add some more interest to your Christmas sign. Allow to dry.
Ensure that the surface of the frame is clean and free of dust and then apply adhesive mounting squares to the backs of the letters and position onto the frame.

And your sign is done!

Your Metallic Acrylic and Wood Christmas Sign would be a beautiful decoration for your mantle, fireplace, wall or entryway table!


