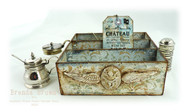
Shabby Tag Box
Posted by DecoArt on Jan 18th 2018
I am so happy to be back in 2018 as part of the DecoArt Mixed Media Design Team and am beginning the year with a shabby project. I have had this tag box for a few months now and decided it was time to paint it up and have it ready to take my finished tags for this year. I have used a mix of Media Acrylic and Chalky Finish paints to achieve a look of age and wear and tear on a brand new greyboard project kit, it is such a pretty distressed look. I love the idea of using moulds and have decided that this year I will look to use more of them on my projects. The ones I have used here I cast using moulds from Prima and the internet.
Items Needed:
- Americana Decor Chalky Finish Paint 2oz - Everlasting (ADC01-30)
- Americana Decor Chalky Finish Paint 2oz - Heritage (ADC09-30)
- Americana Decor Chalky Finish Paint 2oz - Vintage (ADC17-30)
- DecoArt Media Mediums and Specialty Products - Heavy Gel Medium - Gloss (DMM33-71)
- DecoArt Media Varnishes - Ultra-Matte Varnish (DMM24-71)
- Tando Creative - Tag Box Kit
- Moulds
- Assorted Brushes
- Stencil
- Text Stamp
Instructions:
Paint both sides of all the individual box pieces with the Raw Umber Media Fluid Acrylic paint.

For the next few steps, we are concentrating on one side of the box pieces which will become the inside when it is put together. Take the Everlasting and Primitive Chalky Finish paints and blend both colours randomly on one side of the pieces. Give it a quick blast of the heat gun and then use a wet wipe and a piece of dry kitchen roll to rub around the edges and create a shabby worn look to them. Repeat for the other sides of the two pieces that will create the partitions of the inside.

Now take a stencil and create random patterns using Vintage and Heritage Chalky Finish paints. I used a piece of blending foam to blend the colours over the stencil but you could Just as easily use a piece of sponge. Keep the foam/sponge dryish and add more layers of paint rather than have it too thick as it will seep under the stencil and spoil your design. Also, remember which way up your pieces will stand so that the design matches all the way around.

TIP: I thought I would show you how to make yourself a throwaway palette, using kitchen foil, on which you can use the chalky finish paints and foam and then throw the foil away rather than have to clean up your craft mat.

To continue the shabby look and create a bit more depth take a text stamp and use the white Chalky Finish paint again to stamp with.

Use a paintbrush and splatter some watery white and brown acrylic paints over the pieces. Dab with dry kitchen roll if and of the splashes look too bold.

Sand around the top edges of the single pieces and lend in some vintage photo distress ink. Give it a quick blast with the heat gun to help dry it in – but remember it reacts with water so when we use varnish in the next step it will start to move around somewhat.

Now assemble the box using decoupage glue along the edges to bond the sides together and then seal the inside with Ultra Matte Varnish.

Now repeat steps 2 – 6 on the outside of the box finishing with a coat of varnish and let it dry.

Take the moulds you want to use and also paint them with the Everlasting and Primitive Chalky Finish paints. When they are dry rub/brush over some brown wax and then rub with a soft cloth to remove most of it leaving some in the cracks and recesses making them look slightly old and worn. Let it dry and then buff with a dry cloth to get a nice sheen to it.

Adhere these to your box with Heavy Gel Medium and leave the glue to dry thoroughly.

Take a brown distress pen and a small paint brush with clan water and add some more aging and shadowing around the pieces to make them fit with the background.

Thanks for stopping by and taking a look at my first project for the DecoArt Mixed Media Team for 2018.
Wishing you a happy, peaceful and creative New Year.

Hugs Brenda xxx

