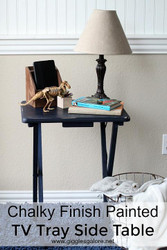
Flea Market TV Tray Makeover
Posted by DecoArt on Aug 25th 2016
I love hitting up our local flea market for inspiration and the thrill of finding that perfect piece, "the diamond in the rough." There is something so alluring about combing through dusty, old forgotten pieces and imagining what it could be with a little TLC. Sometimes I know exactly what I'm looking for and other times I just wander around until inspiration strikes, like it did when I spotted this old wooden TV tray. For less than $10 and in less than an hour I had a new night table my son can use in his bedroom. I love an easy, simple project and this one was no exception.
Items Needed:
- Americana Decor Chalky Finish Paint 8oz - Honor (ADC41-36)
- Wood TV Tray
- Creme Wax
- Paint Brush
- Split Angle Stencil
- Electric Sander Or Sand Paper
Instructions:
This past weekend I ventured out to the local flea market and drug my family with me so we could spend some time together. We are in the process of decorating our kids bedrooms and I was on the hunt to find a small end table for both my son and daughters room, but I wanted something I could personalize and something that wouldn't cost a lot of money. While we were looking at a piece in one of the booths my son kept calling me over to look at the old toys he had found. When I walked over to take a look I saw this simple TV tray sitting beneath the toys, and then in dawned on me. I could use these TV tray as a night table in my sons room! And there was no way I could beat the price, for $5 this little treasure came home with me, ready for a makeover using Chalky Finish Paint.

This little wooden tray had seen a few coats of paint already so I decided to use my electric sander to make sure it was nice and smooth before I started to paint.

I wiped the tray down with a slightly damp cloth to remove any dust and then used my paint brush to apply the Chalky Finish Paint. I love the new colors available and have been dying to find something to use this rich, Honor color on.
I ended up applying three coats of paint. One of the things I love about the Chalky Finish paint is how quickly it dries. Even though I had to do three coats of paint this step went by quickly and I didn't have to wait for hours between coats of paint.

Next, I used the Split Angle stencil to give it a little extra detail and texture. I used the Chalky Finish paint in Relic, another one of my favorites. Once the paint dried I sanded it to give it a worn and faded look.

Finally, once all the coats of paint were dry I applied a light layer of the Creme Wax finish to make sure the little wooden tray was sealed and protected.

With just a few coats of paint my little $5 flea market find got a quick and easy makeover and will serve as the perfect place for my son to keep his favorite books by his bedside.

Enjoy!


