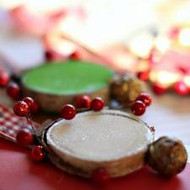
Round Birch Wood Ornaments
Posted by DecoArt on Dec 4th 2015
Items Needed:
- Round Birch Tags
- Floral Accent Pieces
- Ribbon
- Hot Glue
Instructions:
Gather all your supplies. I decided to use a mix of traditional and non traditional holiday colors.

For this ornament project I wanted it to have a primitive or rustic look when finished. These birch tags were perfectly cut, but misshapen and had loose bark edges.
Start out by painting each birch round on one side. Let dry and flip to the other side. When both sides are done. Paint the edges of the bark all the way around with twinkles glitter. Let dry.
Next cut floral accents to measure half way round your birch round. Warm up your hot glue gun.
Spot glue the floral accent with a big dab of glue hot glue. Carefully hold outer side of floral accent in place until dry. I also use tweezers for this part and highly recommend using them if you have them available. Repeat this step for each ornament.

Next measure about 8 inches of holiday ribbon. I used a gingham cotton ribbon with deer print. Hot glue inside of folded over frayed edge into place. Important to use tweezers for this part! Repeat step for other end of ribbon.
Hot glue folded edges together creating a loop for the ornament. Create one for each ornament.

I am showing this laid out only because I couldn't photograph and do the steps. Take Cinnamon stick attach to top ornament where the floral accents are, let dry. Next glue ribbon to back of cinnamon stick. It will look like above but, attached to ornament.

Paint Twinkles Glitter to rustic forest accents and let dry. Next hot glue a rustic forest accent to the bottom of each ornament. (This could be optional depending on taste) You could also use a tiny bell, pinecone or other accent.

You can see the twinkles make the sides and bottom accent piece sparkle in the sunlight. It will do the same with tree lights.

I'm making a few more sets of these ornaments with the other colors too. I hope you enjoy making your own.


