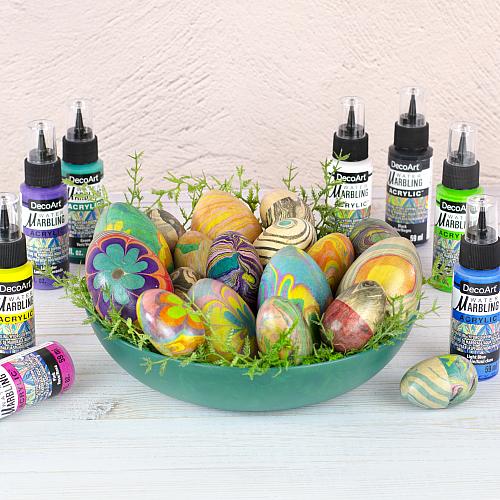
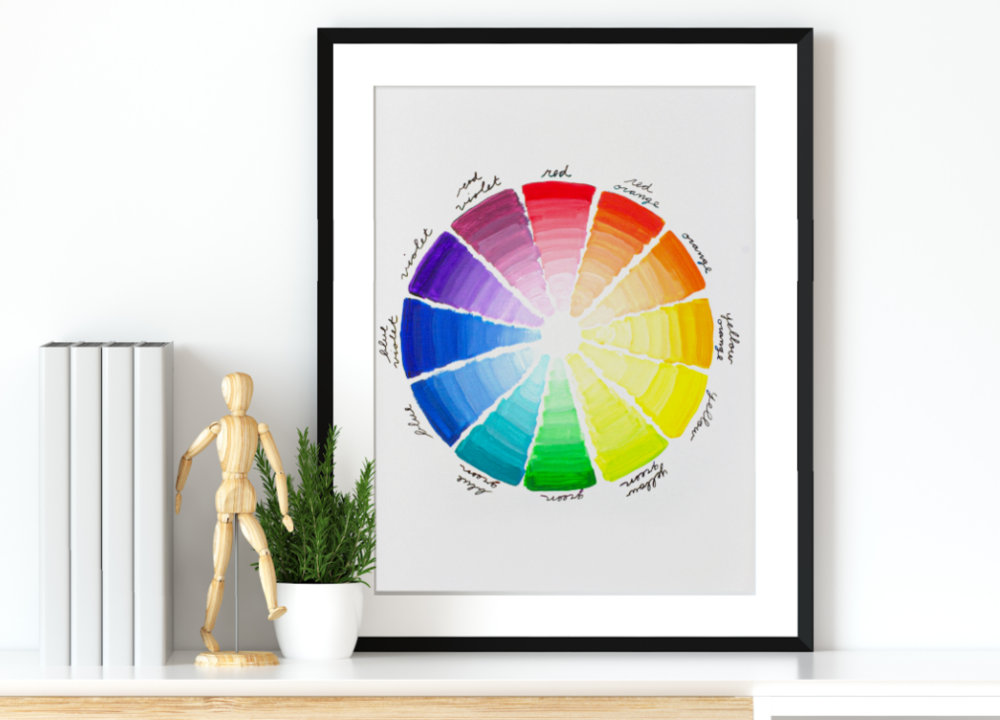
DIY Vintage Egg Sign

DIY Vintage Egg Sign

Posted by DecoArt on Aug 13th 2013

It's no secret that I love distressed items. Making something look vintage or distressed really isn't that hard, but starting with the right surface can make all the difference in the world. This distressed egg sign was made by using an old grainy piece of wood. The plank itself had a lot of raised grains, making it ideal for distressing.

Older pieces of wood are ideal to work with because they have flaws. The flaws are what give the piece character and make it look so vintage.

Items Needed:

  • Plank Of Grainy Wood
  • Sandpaper And Hand Sander
  • Liner Brush
  • Ballpoint Pen
  • Pattern

Instructions:

Instruction Image #1

I started by going into Word and typing letters EGGS. I used the Eurostile font. For the "14 cents dozen" words I used the Monterey BT font. To make the cents symbol in Word click on Insert > Symbol and look for cents sign.

Instruction Image #2

Because your wood plank may vary in size from mine, you may need to print a few copies until you get the size where you want it. The font size that I used for EGGS was 500 (yes, five hundred). The font size for the price statement was 150. This yielded 5 pieces of paper, one letter per sheet and another sheet for the price statement. Once printed, I laid the letters out on the plank just to make sure everything fit.

Instruction Image #3

Setting the print-outs aside, I then painted the plank with Americana Country Red. I allowed this to dry for a couple of hours.

Instruction Image #4

Once dry, I added a coat of Americana Warm White over the red. After letting that dry for about 30 minutes, I added another coat of Warm White and let it dry completely.

Instruction Image #5

Next, position the letters over the white plank.

Instruction Image #6

Use a ball point pen to trace the letters which will leave indents in the wood.

Instruction Image #7

Use a fine liner brush to paint the letters with Americana Soft Black.

Instruction Image #8

Instruction Image #9

Before we move on to the distressing, add a sawtooth hanger to the back of the sign using a hammer.

Instruction Image #10

It's important to make sure the paint has dried completely. If it's still damp all you are going to do with the sander is smear the surface. So as long as your paint has had ample time to dry (3-4 hours), start running a hand sander over the edges to remove the white paint and expose the red beneath. In some areas you will want to expose the bare wood as well. This part is completely up to you.

Control the sander, use it lightly in some areas and press harder in others.

Instruction Image #11

When you are happy with the way it looks, dust it off with a soft brush and add a couple coats of acrylic sealer, I prefer to use a spray. For vintage looking items like this, matte or satin finish is best. Have fun!

Instruction Image #12