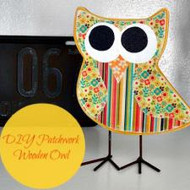
Patchwork Wooden Owl
Posted by DecoArt on Nov 13th 2013
Owl projects are growing in popularity right now. It’s totally understandable considering just how cute they are! Decoupage has been a popular medium for many years, and scrapbook paper is available is so many different colors and patterns it can make your head spin! That’s what made this project so fun for me. My daughter loves owls so I made this for her as a birthday gift and she loves it!
Items Needed:
- Wooden Owl
- Sandpaper
- Recollections Mosaic Memories Paper Or Scrapbook Paper Of Your Choice
- Pattern
Instructions:
Sand any rough edges on wood and dust off. Paint entire owl, front and back, with Mustard Seed.

Using the pattern as a guide cut out the owl pieces from three different scrapbook paper designs. I used stripes for the body, a floral pattern for the head and wings, and a different floral pattern for the beak. Cut 2 large circles for the eyes from white paper, and 2 smaller circles from black or dark patterned scrapbook paper.
Using the wooden owl as a guide trim the paper pieces so that there is about 1/8” of the wood visible when paper is in place.

Apply a thin coat of decoupage to the painted owl and let it dry completely.
Paint a coat of decoupage on the back of the body piece and apply to the owl, pressing out the air from the center outward. Repeat this same process with the head and wing piece.
Apply the beak then the whites of the eyes, and finally the pupils. Let everything dry for two hours before moving to the next step.

Use sandpaper to sand off some of the Mustard Seed paint on the edges of the owl. Run the sandpaper gently across the edges of the paper as well to give it an aged look. Brush off any sanding dust.

Apply an even coat of decoupage over the entire surface of the owl. Allow it to dry completely before displaying.


