Photo Transfer Football Canvas
Posted by DecoArt on Mar 18th 2014
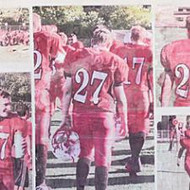
My 15-year old son is a football fanatic and spits out statistics as if he swallowed a sports encyclopedia. He truly loves everything there is about football; the camaraderie, the spirit and of course, playing the game itself. I took a lot of pictures of him during his freshman season and wanted to be able to display some of those moments on canvas.
Instructions:
I’ve used photo transfer medium before, so I was already familiar with the process. If you haven’t used it before, a less ambitious project of just one photo might be better to start with.

I actually created a collage on the computer and then had to size them all properly when I printed them so they would all fit together.
Because my photos had numbers (on the jerseys), I had to reverse the image, which is an easy flip in Photoshop Elements.

I used a paper cutter to trim all the photos, which I printed on regular copy paper. Note that best results are achieved with this product if you use a laser printer. I have an inkjet, so my results are more vintage-looking, but that’s what I wanted anyway.

I laid out the photos on my canvas to make sure they would fit and trimmed where necessary. After I took this photo I realized that I needed to swap the pictures on the left with the pictures on the right!

Ultimately you will be attaching these printed photos to the canvas face down. That’s why the image needs to be reversed if there are numbers or letters in your pictures. The photo transfer medium transfers the image from the paper to the canvas.

Wax paper is a great tool here. You need to cover the front of your picture with the medium, so do it on wax paper to avoid a mess.

Next, lift that picture from the waxed paper and place it face down where you want the image to be on your canvas.

Press out any air bubbles or wrinkles, but work gingerly. You don’t want to rip anything or slide the picture around. Use a straight edge, like a credit card or a palette knife. Some of the medium will seep out the sides. Wipe that away with a damp cloth.

For mine, I kept adding pictures and repeated the “squeegee” process. You can see as the transfer medium meets with the ink it becomes darker and you can see through the back-side of your paper.

Now the hard part… waiting. You need to wait 8 hours. So find a different project to work on, go shopping, do some chores, check email, etc. Just don’t try to do anything too early.
Once the eight hours has passed, you will want to get the surface of your creation wet. It shouldn’t be sitting it a pool of water, but it should definitely be saturated.

See the surface glistening from the moisture? That’s about how much you need.

The next step is to carefully work the paper off the surface. Do this by using a wet sponge and rubbing firmly but gently in a circular motion. You will see the paper start to ball up and crumble off. You will want to have a bowl of water nearby to re-wet your sponge as you work. It takes a while, so be diligent.

When you’re all done, let it dry completely. Finish it off with an acrylic sealer like Dura Clear or Americana spray sealer.


